OVERVIEW
This article details instructions on how to add Authorities within a module.
**Please note, You will need to have your selected Authority Group set up prior to adding Authorities. For help with Creating an Authority please follow this link to the How to Create an Authority User Guide
INSTRUCTIONS
1. Log into your Lighthouse instance and create a new module or locate the one you wish to add Authorities to. Navigate across to the Authorities tab, and select “Add New” (+ button)
2. Under Authority, select your chosen group from the list (Note: Authority Group will need to be made prior)
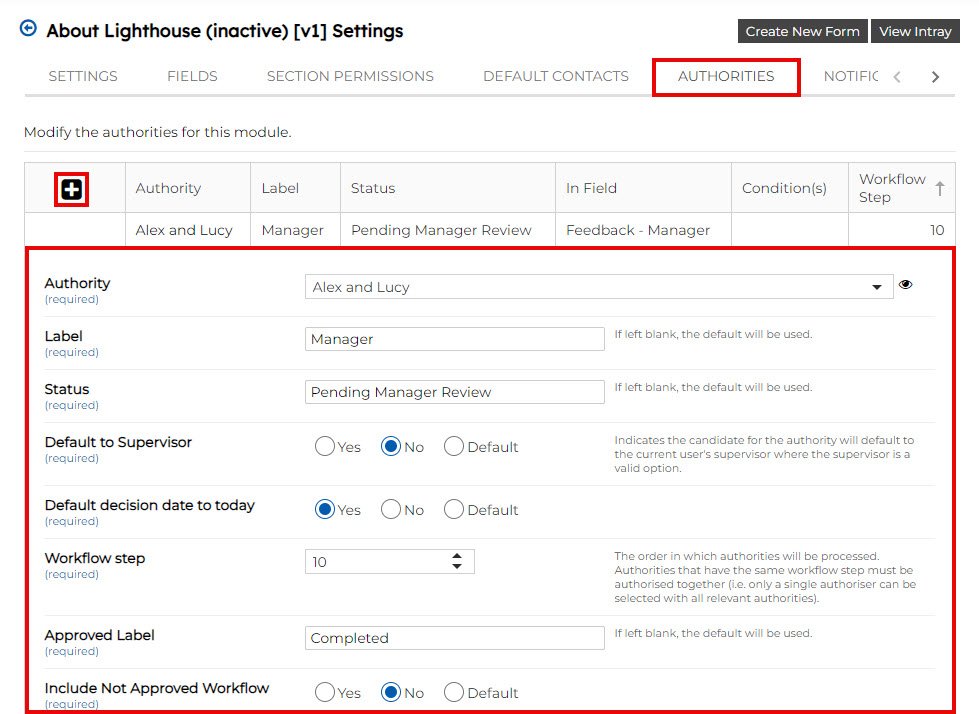
3. The Label will display on the form, write what you would like to be seen (e.g., Manager). In the “User Selected”, choose a user from the authority group you have previously created (or chosen).

4. After submission, the status will display on the top right hand side of the form, and will be seen by the users in the allocated group (e.g., Pending Manager Review).

5. Select if you would like the form to default to the Supervisor.
“Default” will default the form back to its original settings you had in the authority manager.
6. “Default decision date to today” will appear in the approval outcome box, selecting this will default to the date the form is being completed.
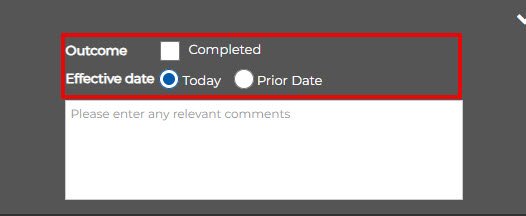
7. The approved label is the check box next to the “outcome” section.
8. Include Not Approved Workflow: Selecting yes will stop the form progressing further due to it not being approved. Selecting no will allow the form to progress to the next stages.
*Selecting “yes” will prompt you to create a Not Approved Label.
Putting the Authority in Fields
1. After creating the Authority, navigate across to the "Fields" tab and located the field you would like to add the authority to.
2. Click on the expansion arrow and select "Add New" button ("+")
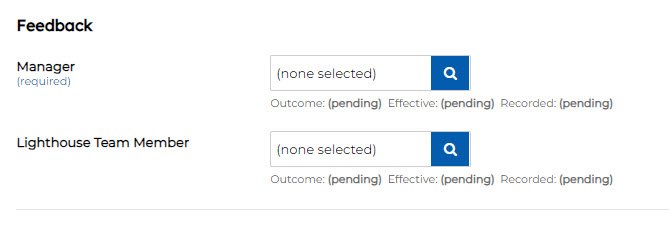
3. Change the field type to "Authorities" and fill in the label section. The label will be visible on the form and help to prompt the user (e.g., Manager, Team Member etc)
4. Untick the "Authorities" section and it will reveal all of the authority group that are in the form. Select the group you would like the user to be able to choose from.
5. Click save.
This is what will appear on the front end of the form:
If you have any issues navigating Authorities, feel free to contact us at helpdesk@lighthousegrc.software