OVERVIEW
This article details instructions about how to schedule and automate custom form actions in Lighthouse.
Prerequisites
Module configurator/ custom form creator
INSTRUCTIONS
- Login to your Lighthouse account.
- Navigate to the custom module settings.
- Navigate across to the Automation tab
Creating a new automated process
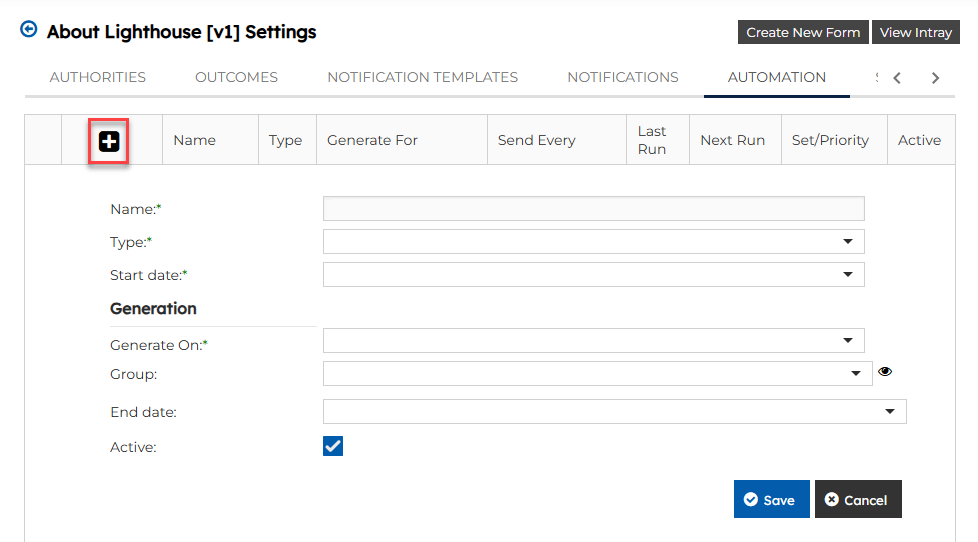
- Click the “+” button to add a new automated process.
- Enter a name for the process.
- Select the type of automated process:
- Create New – Generates a new application and assigns it to the specified user or group.
- Amend Existing – Modifies an existing application, assigns it an amended number, and maintains version history.
- Copy Existing – Duplicates an existing application’s details and assigns it in Pending Submission status to the specified user or group.
- Select a Start Date to define when the automated process should begin.
GENERATION
Generate on: Select how you want the automated process to generate:
- Schedule – Set a recurring schedule using defined intervals and dates.
- Date Field – Trigger the process based on a specific date field.
- Group Monitor (Create New type only) – Monitor a selected group of users to trigger the process:
- Group: Choose the group of users who will receive the automated process.
- Generate form: A trigger setting that allows you to define whether the process runs:
- Create a new form each time a user is added to the group, or
- Only generate one form per user.
Processing set: Here, you can set the priority for processing sets when two conflicting automations are set to generate at the same time.
Processing Priority: If two set processes conflict, you can prioritise which one will take priority.

Note: The default processing setting is Always Runs unless otherwise specified.
SCHEDULE

Send Every: Enter a numerical value to specify how often the message should be sent.
Period: Choose either Day(s) or Month(s) to define the interval with the ‘Send Every’ option above (e.g., every 4 months).
Send On: Select the exact send date based on the start date. You can also choose to automatically adjust the date to the previous Friday, the following Monday, or the nearest weekday.
DATE FIELD
Field – Select the date field you want to generate on. These are date picker fields within the module, or the Submit Date (the date the form was submitted from draft) or the Complete Date (the date the form was marked as completed).
Offset Interval – Choose either Day(s) or Month(s) to define the time unit.
Offset – Enter a numerical value to work with the offset interval (e.g., generate every 4 months).
In new forms – For new automated forms, you can specify whether the selected date field is:
- Cleared (left blank), or
- Copied into the new automated application.
GENERATION CRITERIA (Optional)
Amend Existing/ Copy Existing Type only

You can configure the automated process to run based on specific user-related criteria. These options are applied to a selected user field, and generation will only occur if that field meets the specified conditions:
User Field: Select a user field within the application to base the generation logic on.
User is Active: Generation will occur only if the selected user field references a user who is marked as active.
User is in Group: Optionally, specify a group; generation will only occur if the user referenced by the selected user field is a member of that group.
Note: These criteria apply specifically to the user selected in the chosen user field. Generation will only occur if that user is both active and/or in the specified group, depending on which options are enabled.
ALLOCATE
Select where you want the automated process to be allocated to
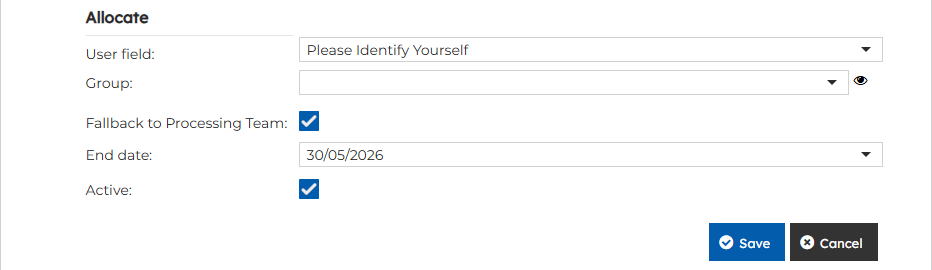
User Field: Select the user field who will be allocated an automated application type.
Group: Select a group of users who will be allocated an automated application type.
Fallback to processing team: If the end user is not available to receive an application, you can have the application fallback to the processing team for management.
End Date: Set an end date for the automated process to end.
Active: Checkbox to make the automated process active or inactive
When you’re done, click Save to keep your automation settings.
Note: The ‘Allocate’ settings follow this priority order – User Field (if it contains a user), then the specified Group (if it has members), and finally the Processing Team as a fallback.
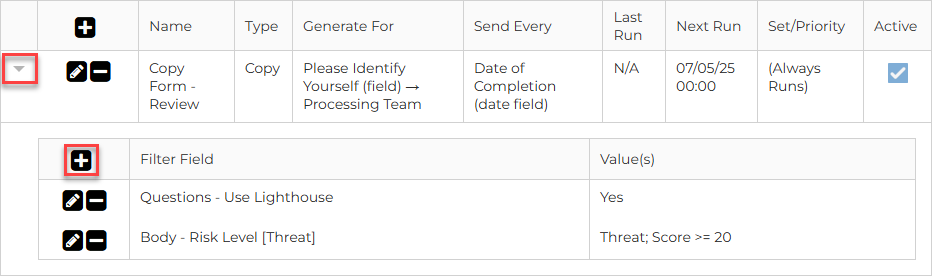
CONFIGURING FILTER FIELDS
You can set filter fields for automated processes. When filter field parameters are used to trigger the process, they will be ANDed together to generate an application.
Example:
Question: Do you use Lighthouse?
Answer: Yes
Question: Risk Level
Answer: High (over 20)
If both conditions are met, the automated function will be triggered.
- To configure the filter fields, click the caret to expand the filter field settings
- Click the “+” button to add a filter field
For further questions or additional information, or if you would like one-on-one training on this setting, please contact our helpdesk. Our team is happy to assist with any queries or support you may need.