OVERVIEW
This article details instructions about how to schedule and automate reports in Lighthouse.
INSTRUCTIONS
1. Logon & Overview
- Login to your Lighthouse account.
- You then need to check that your licence has the Notifications module enabled. To do this you must be a system administrator. Click the settings cog in the top right corner.
- Select ‘System Settings’.
- Select ‘Licence and Modules’ tab.
- In the search bar, type in ‘Notifications’. (Ensure all filters are being shown by clicking the filter icon)
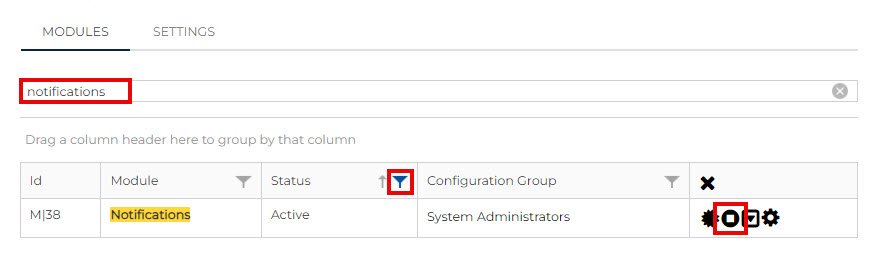
- Ensure the ‘Notifications’ heading is ‘Enabled’.
- If it’s not enabled, the tile will be orange and it will say ‘Disabled’. To enable it, click enable module so it turns on.
- If Notifications are not licensed (will appear as a grey colour), please get in touch with the Torque Software Customer Success Team.
2. Setting up a Notifications Template
- Click the settings cog in the row of icons.
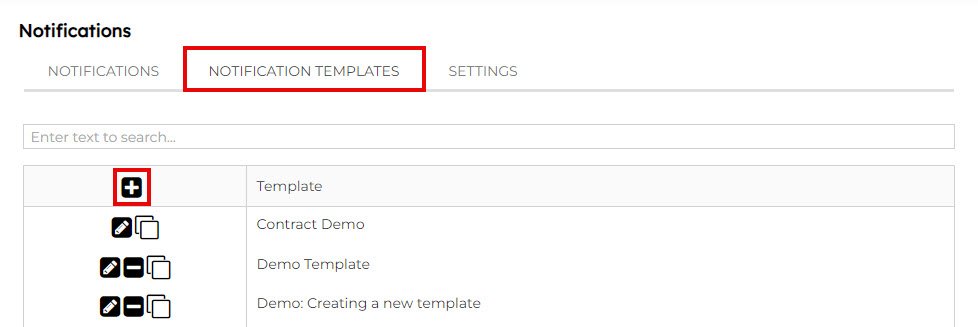
- Then select the ‘Notifications Templates’ tab.
- Any existing notifications templates will appear. Depending on what is already there, you may wish to edit an existing template, create a new template, or duplicate an existing template.
- To create a template from scratch, select ‘New’ (the plus button).
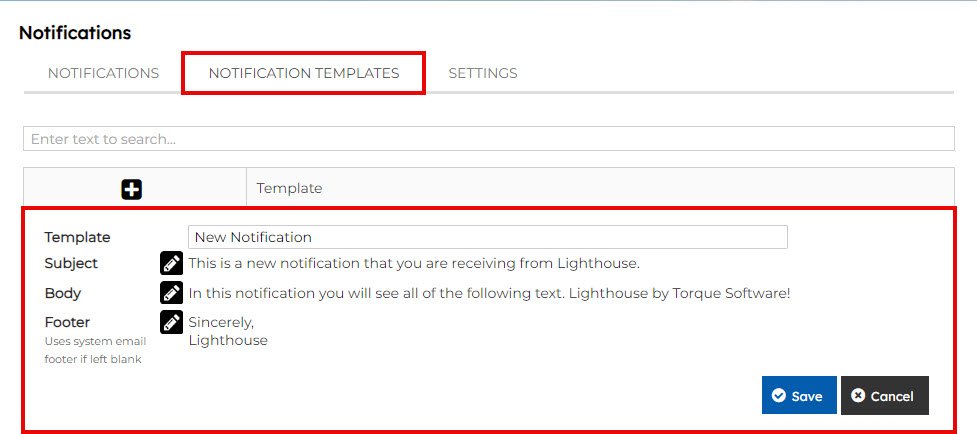
- Template = name of the template.
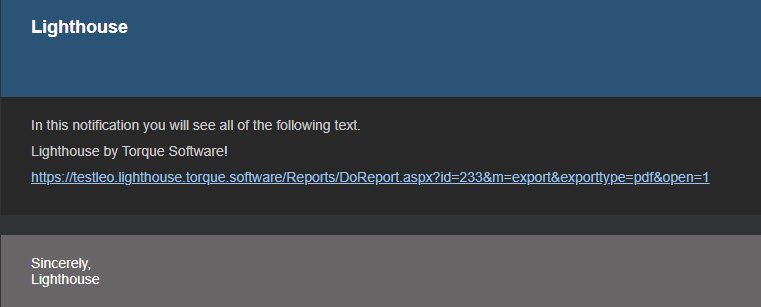
- Subject (click the edit button on the right) = Enter the subject line you would like to have appear when the report is emailed.
- Body = Enter the body of the email you would like to include when the report is emailed.
Note: you can use special merge fields, accessible in the edit screen, that will automatically populate when the notification email is sent. You can add these by selecting either the ‘notification field’ and/or ‘system field’ at the top of the menu bar.
- To include the report information, you will also need to import the report URL into this body of text. To do this, open a new tab in your browser.
- Click ‘Reports’ in the top menu bar.
- Click ‘Report Builder’.
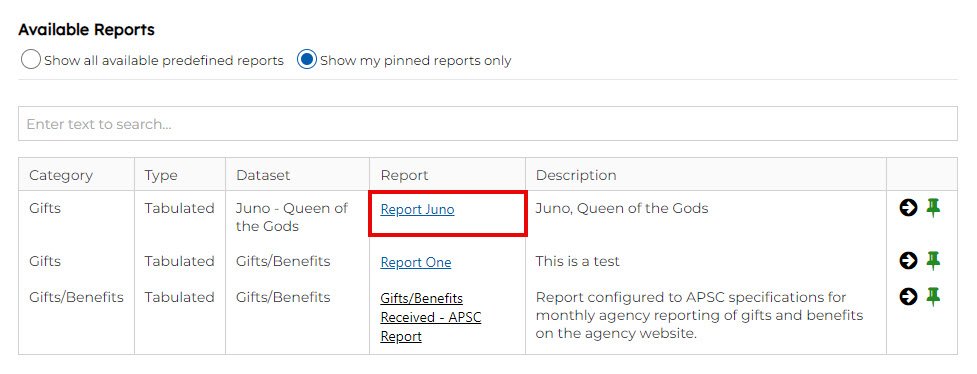
- Click into the relevant report, or create one if you have not done so.

- Once the report is created. Click the link displayed under newly created report tab to access ‘URL Link’
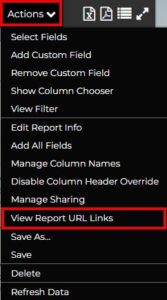
- Click ‘Actions’ in the top right corner.
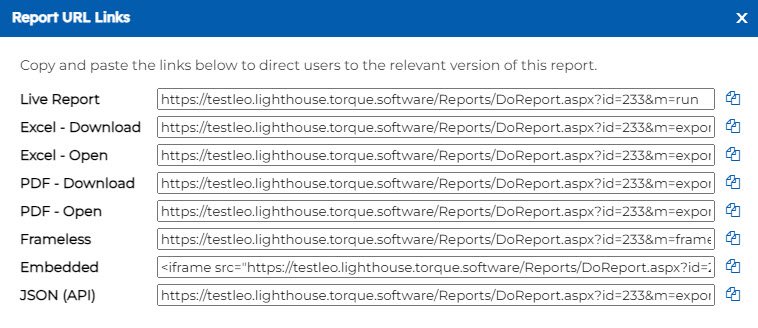
- Click ‘View Report URL Links’ to access links in multiple formats that you can choose based on what is suited to your purposes.
- Go back to the original tab where you were building the report notification and paste that link into the appropriate place in the body of text.
- Highlight the link, and click the link button above.
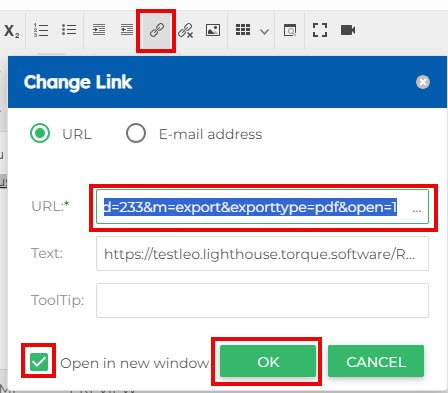
- Click the blue ‘Update’ button.
- And then click save.
3. Schedule the Notification
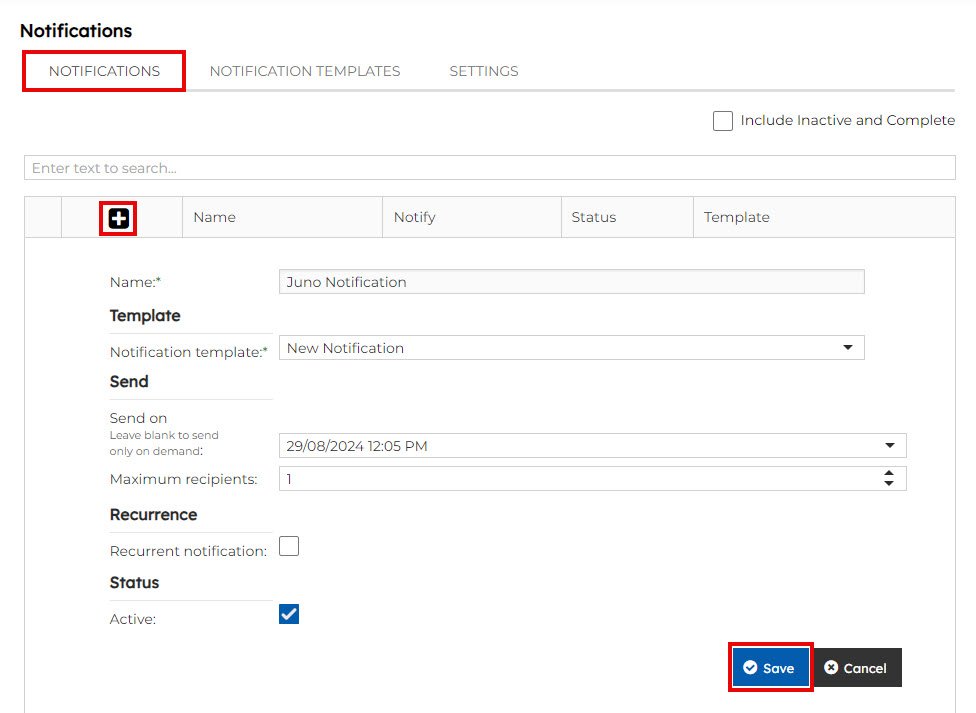
- Click on the ‘Notifications’ tab below the ‘Notifications’ heading, and click the ‘+’ sign.
- 1 – Give the notification a name.
- 2- From the drop-down list, select the notification template that you just set up (see step 2).
- 3 – Select the date you would like this email to be sent. If this is a recurring email, select the start date of when you would like the email to first send.
- 4 – If you would like to cap the number of people who can receive this email, note it here.
- 5 – If you would like this report to be sent as a recurring email, select this box.
- 6 & 7 – Select the recurrence pattern i.e. daily, monthly.
- 8 & 9 – If you would like the recurrence to end after a certain period, note it here. If not, leave it blank.
- 10 – Tick this box if this report is currently in use (active).
- Don’t forget to click the save button to save the notification!
- Now it’s time to add recipients to the scheduled report. To do this, click the right facing arrow button on the left-hand side of the report name.
- Click the plus button above ‘No data to display’.
- In the new pop-up box, search for and select the relevant group. NOTE: Scheduled reports can only be sent to groups. Remember groups can have one or more members.

4. Sending a TEST Workflow notification (OPTIONAL)
- Click on the ‘Notifications’ tab below the ‘Notifications’ heading.
- Locate the report you are after.
- Click the ‘Send’ button (envelope icon).
Note: This report will go to all recipients you added in the above step, if you want it to only go to yourself, remove the existing group and just select a group that only has your name in, temporarily.
- Check your inbox for this email, and review and edit as required!